Naval Battle of Guadalcanal
2007 Schools Wikipedia Selection. Related subjects: World War II
| Naval Battle of Guadalcanal | |||||||
|---|---|---|---|---|---|---|---|
| Part of the Pacific Theatre of World War II | |||||||
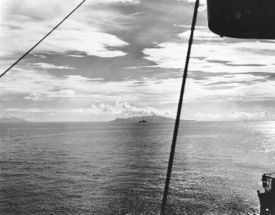
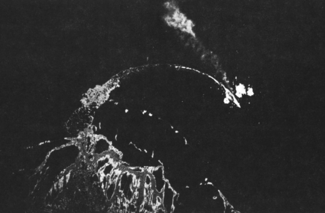
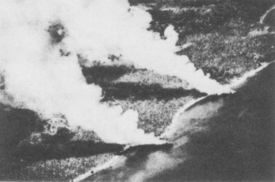
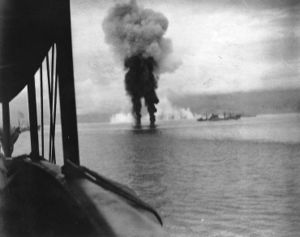 Smoke rises from two Japanese aircraft shot down off Guadalcanal on November 12, 1942. Photographed from USS President Adams; ship at right is USS Betelgeuse. |
|||||||
|
|||||||
| Combatants | |||||||
| United States Australia New Zealand |
Empire of Japan | ||||||
| Commanders | |||||||
| William Halsey, Jr Daniel J. Callaghan† Willis A. Lee |
Isoroku Yamamoto Nobutake Kondo Hiroaki Abe |
||||||
| Strength | |||||||
| 1 carrier, 2 battleships, 5 cruisers, 12 destroyers |
2 battleships, 8 cruisers, 16 destroyers |
||||||
| Casualties | |||||||
| 2 light cruisers, 7 destroyers sunk, 26 aircraft destroyed, 1,732 killed |
2 battleships, 1 heavy cruiser, 3 destroyers, 11 transports sunk, 41 aircraft destroyed, 1,900–4,900 killed |
||||||
| Guadalcanal campaign |
|---|
| Tulagi – Savo I. – Tenaru – Eastern Solomons – Edson's Ridge – Cape Esperance – Henderson Field – Santa Cruz Is. – Naval Guadalcanal – Tassafaronga – Ke – Rennell I. |
| Solomon Islands campaign |
|---|
| 1st Tulagi – Guadalcanal – Blackett Strait – Cartwheel – Death of Yamamoto – New Georgia – Kula Gulf – Kolombangara – Vella Gulf – Horaniu – Vella Lavella – Naval Vella Lavella – Treasury Is. – Choiseul – Empress Augusta Bay – Cape St. George – Green Is. – 2nd Rabaul – Bougainville |
The Naval Battle of Guadalcanal, sometimes referred to as the Third Battle of Savo Island or, in Japanese sources, as the Third Battle of the Solomon Sea (第三次ソロモン海戦), took place November 12–15, 1942, and was the decisive battle in a series of naval battles that took place between Allied (primarily U.S.) and Japanese forces during the months-long Battle of Guadalcanal in the Solomon Islands. The battle consisted of a sequence of combined air and sea engagements spread over four days, most of them in the vicinity of Guadalcanal. All of the engagements were directly related to a single effort by the Japanese to reinforce their land forces on Guadalcanal, and are all therefore considered to be different parts of the same battle.
In two extremely destructive nighttime surface warship engagements, both adversaries lost numerous ships. Also, U.S. daytime air attacks over several days sank or damaged a number of Japanese warships and transport ships. The sum of these engagements was that the U.S. was successful in turning back Japan's last major attempt to dislodge Allied forces from their positions on Guadalcanal and nearby Tulagi. Thus, the battle resulted in a significant strategic victory for the U.S. and its allies.
Background
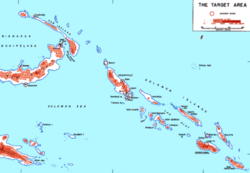
On August 7, 1942, Allied forces (primarily U.S.) landed on Guadalcanal, Tulagi, and the Florida Islands in the Solomon Islands. The landings on the islands were meant to deny their use by the Japanese as bases to threaten the supply routes between the U.S. and Australia and to use them as starting points for a campaign with the eventual goal of isolating the major Japanese base at Rabaul while also supporting the Allied New Guinea and New Britain campaigns. The landings initiated the six-month-long Battle of Guadalcanal.
Due to the constant threat by Japanese aircraft and warships around the Solomon Islands, Allied forces were unable to frequently resupply their forces on Guadalcanal, who were often under attack from Japanese land and sea forces in the area. In early November, 1942, Allied intelligence reports indicated that the Japanese were preparing their own offensive to try to retake the islands from the U.S. and its allies. Therefore, the U.S. mounted a major resupply and reinforcement effort by sending Task Force 67, a large reinforcement and resupply convoy commanded by Rear Admiral Richmond K. Turner, to support its forces at Guadalcanal on November 11. The supply ships were protected by task groups commanded by Rear Admirals Daniel J. Callaghan and Norman Scott as well as aircraft from Henderson Field on Guadalcanal. The Japanese conducted several air attacks on these supply ships at Guadalcanal on November 11 and 12, using aircraft based at Buin, Bougainville in the Solomon Islands. However, most of the U.S. supply ships were unloaded without serious damage and 12 of the Japanese aircraft were shot down by anti-aircraft fire from the U.S. ships or by fighter aircraft from Henderson Field.
The last major attempt to retake Guadalcanal and Henderson Field by the Japanese army had occurred from October 20–26 in the Battle for Henderson Field and had been defeated with heavy losses for the Japanese. At the same time, Admiral Isoroku Yamamoto (the commander of the Japanese Combined Fleet) had attempted to decisively defeat U.S. naval forces in the Battle of the Santa Cruz Islands. In that battle, U.S. naval forces were defeated and driven from the area with the loss of one aircraft carrier and severe damage to another. However, the Japanese carriers themselves were forced to retreat due to crippling losses to their carrier aircraft and aircrews. Thereafter, Yamamoto's ships returned to their main bases at Truk in Micronesia, where he had his headquarters, and Rabaul on New Britain while three of the four Japanese carriers returned to Japan for repairs and refitting.
The Japanese army planned another attack on Guadalcanal, but further reinforcements were needed before the operation could proceed. The army requested assistance from Yamamoto to deliver the needed reinforcements to the island and to support their planned offensive on the Allied forces guarding Henderson Field. To support the reinforcement effort, Yamamoto provided 11 large transport ships to carry 7,000 army troops, their ammunition, food, and heavy equipment to Guadalcanal. He also provided a warship support force that included two battleships. The two battleships, Hiei and Kirishima, equipped with special fragmentation shells, were to bombard Henderson Field and destroy it and/or the aircraft stationed there in order to allow the slow, heavy transports to reach Guadalcanal safely. The warship force was commanded by recently-promoted Vice Admiral Hiroaki Abe from Hiei.
First Naval Battle of Guadalcanal, November 13
Prelude
Abe's warship force and the transports assembled near the Shortland Islands and proceeded down " The Slot" towards Guadacanal on November 12 with an estimated arrival time for the warships of early morning, November 13, with the slower transport ships travelling some distance behind. In addition to the two battleships, the Japanese force included the light cruiser Nagara and 11 destroyers: Samidare, Murasame, Asagumo, Teruzuki, Amatsukaze, Yukikaze, Ikazuchi, Inazuma, Akatsuki, Harusame, and Yudachi. Three destroyers ( Shigure, Shiratsuyu, and Yugure) would provide a rear guard in the Russell Islands during Abe's foray into " Ironbottom Sound" off the north coast of Guadalcanal. U.S. reconnaissance aircraft observed the Japanese ships' approach.
The U.S. supply ships at Guadalcanal departed by early evening November 12 but Turner detached all useable combat ships to protect the troops ashore from the expected Japanese attack and/or reinforcement effort. Callaghan was a few days' senior to the more experienced Scott, and therefore was placed in overall command. Callaghan prepared his force to meet the Japanese that night in the sound. His force comprised two heavy cruisers ( San Francisco and Portland), three light cruisers ( Helena, Juneau, and Atlanta), and eight destroyers: Cushing, Laffey, Sterett, O'Bannon, Aaron Ward, Barton, Monssen, and Fletcher. Admiral Callaghan commanded from San Francisco.
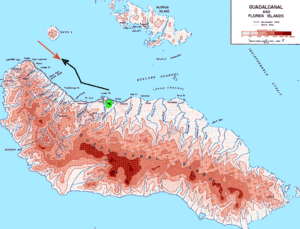
During their approach to Guadalcanal, the Japanese force passed through a large and intense rain squall which, along with a complex formation plus some confusing orders from Abe, split the formation into several groups. The U.S. force steamed in a single column around Ironbottom Sound, with destroyers in the lead and rear of the column, and the cruisers in the centre. Five ships had the new, superior SG radar, but Callaghan's deployment put none of them in the forward part of the column, nor did he choose one for his flagship.
Action
At about 01:25 on November 13, in almost complete pitch darkness due to the bad weather and dark moon, the ships of the Japanese force entered the sound between Savo Island and Guadalcanal and prepared to bombard Henderson Field. Several of the U.S. ships detected the Japanese ships on radar, beginning about 01:24, but had trouble communicating the information to Callaghan due to problems with their ship's radio equipment and lack of discipline with their communications procedures. Several minutes later, both forces visually sighted each other about the same time but both Abe and Callaghan hesitated ordering their ships into action. Abe apparently was surprised by the proximity of the U.S. ships and couldn't decide if he should momentarily withdraw to give his ships time to change from bombardment ammunition to anti-ship ammunition or to continue onward. He decided to continue onward. Callaghan, apparently intended to attempt to cross the T of the Japanese, as Scott had done at Cape Esperance, but confused by the incomplete information he was receiving, plus the fact that the Japanese formation consisted of several, scattered groups, he gave several confusing orders on ship movements. The U.S. ship formation began to fall apart, apparently further delaying Callaghan's order to commence firing as he first tried to straighten out his ship's locations. Meanwhile, both forces continued to head directly for each other.
At 01:48, the Japanese ships Akatsuki and Hiei turned on large searchlights and lit up Atlanta only 3,000 yards away—almost point-blank range for large naval artillery. Several of the ships on both sides spontaneously opened fire. Realizing that his force was almost surrounded by Japanese ships, Callaghan ordered, "Odd ships fire to starboard, even ships fire to port." Most of the remaining U.S. ships then opened fire, although several had to quickly change their targets in order to comply with Callaghan's order. As the ships from the two sides intermingled, they battled each other in an utterly confused and chaotic melée at close distances. Afterwards, an officer on Monssen likened it to "a barroom brawl after the lights had been shot out".
At least six of the U.S. ships, including Laffey, O'Bannon, Atlanta, San Francisco, Portland, and Helena, fired at Akatsuki, which drew attention to herself with her illuminated searchlight. Akatsuki blew up and sank within a few minutes, but not before hitting Atlanta with shells and a torpedo. Only eight crewmen (out of a total complement of 197) survived the sinking of Akatsuki and were later captured by U.S. forces.
Perhaps due to being the lead cruiser in the U.S. formation, Atlanta was the target of fire from several Japanese ships, probably including Nagara, Inazuma, and Ikazuchi, in addition to Akatsuki. The gunfire caused Atlanta heavy damage, and the torpedo hit cut all of her engineering power. Atlanta now drifted into the line of fire of San Francisco, which accidentally fired on Atlanta, causing even greater damage, and killing Admiral Scott and much of the bridge crew. Atlanta, without power or able to fire her guns, now drifted out of control and out of the battle as the Japanese ships passed her by. The lead U.S. destroyer, Cushing, was also caught in a crossfire between several Japanese destroyers and perhaps Nagara. She too was hit heavily and stopped dead in the water.
Hiei, with her nine lit searchights, huge size, and course taking her directly through the U.S. formation, now became the focus of gunfire from many of the U.S. ships. Laffey passed so close to Hiei that they missed colliding by 20 feet. Hiei was unable to depress her main or secondary batteries low enough to hit Laffey, but Laffey was able to rake Hiei’s superstructure with 5-inch shells and machinegun fire, causing heavy damage to Hiei’s superstructure and bridge, wounding Admiral Abe, and killing his chief of staff. Admiral Abe was thereafter limited in his ability to direct his ships for the rest of the battle. Sterett and O'Bannon likewise pumped several salvos into Hiei’s superstructure from close range, and perhaps one or two torpedoes into her hull, causing Hiei further damage, before both destroyers escaped into the darkness.
Unable to fire her main or secondary batteries at the three destroyers causing her so much trouble, Hiei instead concentrated on San Francisco which was passing by only 2,500 yards away. Along with Kirishima, Inazuma, and Ikazuchi, the four ships made repeated hits on San Francisco, disabling her steering control and killing Admiral Callaghan, Captain Cassin Young, and most of the bridge staff. The first few salvos from Hiei and Kirishima consisted of the special fragmentation bombardment shells, which reduced damage to the interior of San Francisco, and may have saved her from being sunk outright. Not expecting a ship-to-ship confrontation, it took the crews of the two Japanese battleships several minutes to switch to armor-piercing ammunition. Nevertheless, San Francisco, now almost helpless to defend herself, managed to momentarily sail clear of the melee. However, she managed to land at least one shell in the Hiei’s steering gear room during the exchange, flooding it with water, shorting out her power steering generators, and severely inhibiting Hiei’s steering capability. Helena followed San Francisco to try and protect her from further harm.
Two of the U.S. destroyers now met a sudden demise. Either Nagara, or Teruzuki, and Yukikaze came upon the drifting Cushing and pounded her mercilessly with gunfire, knocking out all of her systems. Unable to fight back, Cushing’s crew abandoned ship. Cushing’s hulk sank several hours later. Laffey, having escaped from her engagement with Hiei suddenly encountered Asagumo, Murasame, Samidare, and, perhaps, Teruzuki. The Japanese destroyers pounded the Laffey with gunfire and then hit her with a torpedo which broke her keel. A few minutes later fires reached her ammunition magazines and she blew up and sank.
Portland, after helping sink Akatsuki, was hit by a torpedo from Inazuma or Ikazuchi, causing heavy damage to her stern and forcing her to steer in a circle. After completing her first loop, she was able to fire four salvos at Hiei, but otherwise took little further part in the battle.
Yudachi and Amatsukaze now independently charged the rear five ships of the U.S. formation. Two torpedoes from Amatsukaze hit Barton, immediately sinking her with heavy loss of life. Yudachi planted a torpedo in Juneau, stopping Juneau dead in the water, breaking her keel, and knocking out most of her systems. Juneau then turned east and slowly crept out of the battle area.
Monssen avoided the wreck of Barton and motored onward looking for targets. She was suddenly accosted by Asagumo, Murasame, and Samidare who had just finished blasting Laffey. They proceeded to smother Monssen with gunfire, damaging her severely and forcing the crew to abandon ship. The hulk sank sometime later.
Amatsukaze now approached the San Francisco with the intention of finishing her off. However, while concentrating on San Francisco, Amatsukaze didn't notice the approach of Helena which fired several full broadsides at Amatsukaze from close range and knocked her out of the action. The heavily damaged Amatsukaze escaped under cover of a smoke screen and while Helena was distracted by an attack by Asagumo, Murasame, and Samidare.
Aaron Ward and Sterett, independently searching for targets, both sighted Yudachi, who appeared unaware of the approach of the two U.S. destroyers. Both U.S. ships hit Yudachi simultaneously with gunfire and torpedoes, literally blasting her out of the water and forcing her crew to abandon ship. However, the ship didn't sink right away. Continuing on her way, Sterett was suddenly ambushed by Teruzuki, heavily damaged, and forced to withdraw from the battle area to the east. Aaron Ward found herself in a one-on-one duel with Kirishima, which Aaron Ward lost with heavy damage to herself. She also tried to retire from the battle area to the east but soon stopped dead in the water due to damage to her engines.
Robert Leckie, then a Marine private on Guadalcanal, described the battle:
| The star shells rose, terrible and red. Giant tracers flashed across the night in orange arches. ... the sea seemed a sheet of polished obsidian on which the warships seemed to have been dropped and were immobilized, centered amid concentric circles like shock waves that form around a stone dropped in mud. |
After nearly 40 minutes of brutal, close-quarters fighting, the two sides broke contact and ceased fire at 02:26 after Abe and Captain Gilbert Hoover (the captain of Helena and senior surviving U.S. officer at this point) ordered their respective forces to disengage. Admiral Abe appeared to have a decisive victory in his grasp. He had one battleship (Kirishima), one light cruiser (Nagara), and four destroyers (Asagumo, Teruzuki, Yukikaze, and Harusame) with only light damage that could continue fighting (Inazuma, Ikazuchi, Murasame, and Samidare were damaged enough that their fighting ability was somewhat impaired). The U.S. had only one light cruiser (Helena) and one destroyer (Fletcher) that were still capable of effective resistance. The way appeared clear for Abe to bombard Henderson Field, and, perhaps, finish off the U.S. naval forces in the area, clearing the way for the troops and supplies to be landed safely on Guadalcanal.
However, at this crucial juncture, Abe chose to abandon the mission and depart the area. Several reasons are conjectured as to why he made this decision. Japanese commanders, from the beginning of the war, were constantly and strongly reminded of the crucial need to conserve fuel, ammunition, and to not risk ships unnecessarily. Thus, the damage to his flagship, Hiei and his other ships plus his expenditures of fuel and ammunition during the battle may have heavily concerned Abe. His own injuries and the deaths of some of his staff from battle action may have affected his thought processes. Perhaps he was also unsure as to how many of his or the U.S. ships were still combat-capable due to communication problems with the damaged Hiei. Furthermore, his own ships were scattered and would have taken some time to reassemble for a coordinated resumption of the mission to attack Henderson Field and the remnants of the U.S. warship force. For whatever reason, Abe now called for a disengagement and general retreat of his warships, although Yukikaze and Teruzuki remained behind to assist Hiei. Samidare picked-up survivors from Yudachi at 03:00 before joining the other Japanese ships in the retreat northwards.
Aftermath
At 03:00 on November 13, Admiral Yamamoto postponed the planned landings of the transports, which returned to the Shortlands to await further orders. Dawn revealed three crippled Japanese (Hiei, Yudachi, and Amatsukaze), and three crippled U.S. ships (Portland, Atlanta, and Aaron Ward) in the general vicinity of Savo Island. Amatsukaze was attacked by dive-bombers but managed to escape to Truk and eventually returned to action several months later. The abandoned hulk of Yudachi was sunk by Portland, whose guns still worked in spite of the other damage to the ship. The tugboat Bobolink motored around Ironbottom Sound throughout the day of November 13, assisting the crippled U.S. ships, rescuing U.S. survivors from the water, and, reportedly, shooting Japanese survivors floating in the water. Hiei was attacked repeatedly by Marine TBF Avenger torpedo planes from Henderson Field, TBFs and SBD Dauntless dive-bombers from the carrier Enterprise, and B-17 bombers of the United States Army Air Forces 11th Heavy Bombardment Group from Espiritu Santo. Abe transferred himself and his staff to Yukikaze at 08:15. Kirishima was ordered by Abe to take Hiei under tow, escorted by Nagara and its destroyers, but the attempt was cancelled because of the threat of submarine attack and Hiei's increasing unseaworthiness.
Portland, San Francisco, Aaron Ward, Sterett, and O'Bannon were eventually able to make it back to rear-area ports for repairs. Atlanta, however, sank near Guadalcanal at 20:00 on November 13. Departing from the Solomon Islands area with San Francisco, Helena, Sterret, and O'Bannon later that day, Juneau was sunk by Japanese submarine I-26. Juneau’s 100+ survivors (out of a total complement of 650) were left to fend on their own in the open ocean for eight days before rescue aircraft belatedly arrived. While awaiting rescue, all but 10 of Juneau’s crew died from their injuries, the elements, or savage shark attacks. The dead included the five Sullivan brothers
Due to the confused nature of the battle, the U.S. believed that they had sunk as many as seven Japanese ships. This, plus the Japanese retreat, caused the U.S. to believe at the time that they had won a significant victory. It was only after the war that the U.S. learned that they had suffered what most see as a crushing tactical defeat.
Nevertheless, most historians appear to agree that Abe's decision to retreat turned his tactical victory into a strategic defeat. Henderson Field remained operational with attack aircraft ready to deter the slow Japanese transports from approaching Gualdacanal with their precious cargoes. Plus, the Japanese had lost an opportunity to eliminate the U.S. naval forces in the area, a result which would have taken even the comparatively resource-rich U.S. some time to recover from. A reportedly furious Admiral Yamamoto relieved Abe of command and later directed his forced retirement from the military. However, it appears that Yamamoto may have been more angry over the loss of one of his battleships (Hiei) than he was over the abandonment of the supply mission and failure to completely destroy the U.S. force. Shortly before noon, Yamamoto ordered Vice Admiral Nobutake Kondo, commanding the Second Fleet, to form a new bombardment unit around Kirishima with fresh ships and attack Henderson Field on the night of November 14-15.
Including the sinking of Juneau, total U.S. losses in the battle were 1,439 dead. The Japanese suffered between 550 to 800 dead. Analyzing the impact of this engagement, historian Richard B. Frank states,
| This action stands without peer for furious, close-range, and confused fighting during the war. But the result was not decisive. The self-sacrifice of Callaghan and his task force had purchased one night's respite for Henderson Field. It had postponed, not stopped, the landing of major Japanese reinforcements, nor had the greater portion of the (Japanese) Combined Fleet yet been heard from." |
Other actions, November 13–14
Although the reinforcement effort to Guadalcanal was delayed, the Japanese didn't give up trying to complete the original mission, albeit a day later than originally planned. In the afternoon of November 13, the 11 transports resumed their journey towards Guadalcanal. A Japanese force of cruisers and destroyers, originally assigned to cover the unloading of the transports on the evening of November 13, was now given the mission that Abe's force had failed to carry out—the bombardment of Henderson Field. The battleship Kirishima, after abandonning its rescue effort of Hiei on the morning of the 13th, steamed north between Santa Isabel and Malaita Islands to form the new bombardment unit. After sustaining more damage from air attacks, Hiei sank northwest of Savo Island, perhaps after being scuttled by her remaining crew, in the late evening of November 13.
The cruiser force, consisting of Eighth Fleet units under its commander, Vice Admiral Gunichi Mikawa, included the heavy cruisers Chōkai, Kinugasa, Maya, and Suzuya, light cruisers Isuzu and Tenryū, and six destroyers. Mikawa's force was able to slip into the Guadalcanal area uncontested due to the withdrawal of the battered U.S. naval forces. Suzuya and Maya bombarded Henderson Field while the rest of Mikawa's force cruised around Savo Island guarding against any U.S. surface attack (which didn't occur). The 35-minute bombardment caused some damage to various aircraft and facilities at the airfield, but didn't put it out of operation. The cruiser force ended the bombardment around 02:30 on November 14 and cleared the area to head towards Rabaul via the Shortlands.
At daybreak, aircraft from Henderson Field, Espiritu Santo, and Enterprise (stationed 200 miles south of Guadalcanal), began their attacks, first on Mikawa's force that was heading away from Guadalcanal, and then on the transport force heading towards Guadalcanal. The attacks on Mikawa's force sank the heavy cruiser Kinugasa, killing 511 of her crew, and damaged Maya, forcing her to go to Japan for repairs. Repeated air attacks on the transport force sank six of the transports and forced one more to turn back with heavy damage. Survivors from the transports were rescued by the convoy's escorting destroyers. A total of 450 army troops were reported to have perished. The remaining four transports and undamaged destroyers continued towards Guadalcanal after nightfall of November 14 but stopped west of Guadalcanal to await the finish of the warship surface action (below) before continuing.
Kondo's ad hoc force rendezvoused at Ontong Java on the evening of November 13, then reversed course and refueled out of range of Henderson Field's bombers on the morning of November 14. The U.S. submarine Trout stalked but was unable to attack the Kirishima during refueling. The bombardment force continued south and came under air attack late in the afternoon of November 14, during which they were intercepted by the U.S. submarine Flying Fish which launched five torpedos but scored no hits, then reported its contact by radio.
Second Naval Battle of Guadalcanal, November 14–15
Prelude
To cover the unloading of the transports at Guadalcanal, the Japanese fleet made its third attempt to neutralize Henderson Field, sending the force of warships under Admiral Kondo through Indispensible Strait to bombard Guadalcanal on the night of November 14- 15. The force included Kirishima, heavy cruisers Atago and Takao, light cruisers Nagara and Sendai, and nine destroyers, some of the destroyers being survivors (along with Kirishima and Nagara) of the first night engagement two days prior. Kondo flew his flag in the cruiser Atago. The force approached Guadalcanal around midnight and a quarter moon provided moderate visibility.
Low on ships, Admiral William Halsey, Jr. detached the new battleships Washington and South Dakota, of Enterprise's support group, together with four destroyers, as Task Force 64 under Admiral Willis A. Lee to defend Guadalcanal. It was a scratch force; the battleships had only operated together for a few days, and the destroyers were from four different divisions—chosen simply because, of the available destroyers, they had the most fuel. The U.S. force arrived in Ironbottom Sound in the early evening of November 14 and began patrolling around Savo Island. The U.S. warships were in column formation with the four destroyers in the lead, followed by Washington, with South Dakota bringing up the rear. At 22:55 on November 14, radar on the South Dakota and Washington began to detect the ships of the Japanese force near Savo Island around 18,000 m range.
Action
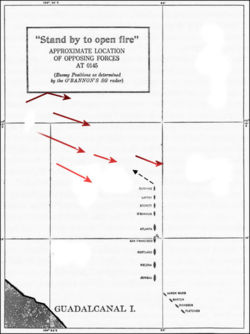
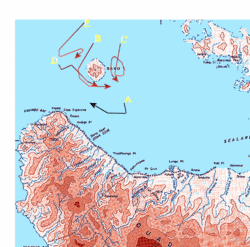
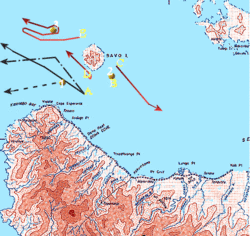
Kondo split his force into several groups, with one group, consisting of Sendai and destroyers Shikinami and Uranami ("C" on the maps), sweeping along the east side of Savo Island, and destroyer Ayanami ("B" on the maps) sweeping counterclockwise around the southwest side of Savo Island to check for the presence of Allied ships. The Japanese ships spotted Lee's force around 23:00, though Kondo misidentified the battleships as cruisers. Kondo ordered the Sendai group of ships, plus Nagara and four destroyers ("D" on the maps) to engage and destroy the U.S. force before he brought the bombardment force of Kirishima and heavy cruisers ("E" on the maps) into Ironbottom Sound. The U.S. ships ("A" on the maps) detected the Sendai force on radar, but didn't detect the other groups of Japanese ships. Using radar targeting, the two U.S. battleships opened fire on the Sendai group at 23:17. Admiral Lee ordered a cease fire about five minutes later after the radar returns on the northern group appeared to disappear from his ship's radar scopes. However, Sendai, Uranami, and Shikinami were undamaged and circled out of the danger area.
Meanwhile, the four U.S. destroyers in the vanguard of the U.S. formation began engaging both Ayanami and the Nagara group of ships at 23:22. Nagara and her escorting destroyers responded effectively with accurate gunfire and torpedoes and U.S. destroyers Walke and Preston were hit and sunk within 10 minutes with heavy loss of life. The U.S. destroyer Benham had part of her bow blown off by a torpedo and had to retreat (she sank the next day) and U.S. destroyer Gwin was hit in her engine room and put out of the fight. However, the U.S. destroyers had completed their mission as screens for the battleships, absorbing the initial impact of contact with the enemy, although at great cost. Lee ordered the retirement of Benham and Gwin at 23:48.
Washington passed through the area still occupied by the damaged and sinking U.S. destroyers and fired on Ayanami with her secondary batteries, setting her afire. Following close behind, South Dakota suddenly suffered a series of electrical failures, reportedly during repairs when her chief engineer locked down a circuit breaker in violation of safety procedures, causing her circuits repeatedly to go into series, making her radar and most of her gun batteries inoperable. However, she continued to follow Washington towards the western side of Savo Island. Receiving reports from Ayanami and others of his ships of the destruction of the U.S. destroyers, Kondo now pointed his bombardment force towards Guadalcanal, believing that the U.S. warship force had been defeated. His force and the two U.S. battleships were now heading towards each other.
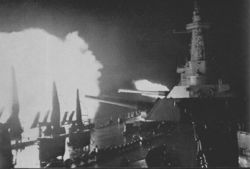
Almost blind and unable to effectively fire her main and secondary armament, South Dakota was targeted by gunfire and torpedoes by most of the ships of the Japanese force, including Kirishima, beginning about 00:00 on November 15. Although able to score a few hits on Kirishima, South Dakota took between 36 and 42 medium and large caliber hits to her superstructure, some of which did not explode, that completely knocked out her communications and remaining gunfire control operations, set portions of her upper decks on fire, and forced her to try to steer away from the engagement. (The "Gunfire Damage Report" made by the Bureau of Ships showed 26 damaging hits and can be found at 6th and succeeding photos) All of the Japanese torpedoes missed. Admiral Lee later described the cumulative effect of the gunfire damage to South Dakota as to, "render one of our new battleships deaf, dumb, blind, and impotent." South Dakota's crew casualties were 39 killed and 59 wounded, and she turned away from the battle at 00:17 without informing Admiral Lee, though observed by Kondo's lookouts.
The Japanese ships had continued to concentrate their fire on South Dakota and none had detected Washington approaching to within 9,000 yards. From this close range, the Washington suddenly hit Kirishima with at least nine main battery shells, causing heavy damage and setting her aflame. Kirishima was hit below the waterline and suffered a jammed rudder, causing her to circle uncontrollably to port.
At 00:25 Kondo ordered all of his ships that were able to converge, to try to destroy any remaining U.S. ships. However, the Japanese ships still didn't know where Washington was located and the other surviving U.S. ships had already departed the battle area. Washington steered a northwesterly course towards the Russell Islands to draw the Japanese force away from Guadalcanal and the presumably damaged South Dakota. The Japanese ships finally sighted Washington and launched several torpedo attacks but by adroit maneuvering by her captain, Washington avoided all of them and also grounding his ship in shallow waters. At length, believing that the way was clear for the transport convoy to proceed to Guadalcanal (but apparently disregarding the threat of air attack in the morning), Kondo ordered his remaining ships to break contact and retreat from the area about 01:04, which the Japanese ships complied with by 01:30.
Aftermath
Both Kirishima and Ayanami were scuttled and sank by 03:25, November 15. Uranami rescued survivors from Ayanami and destroyers Asagumo, Teruzuki, and Samidare rescued the remaining crew from Kirishima. In the engagement, 242 U.S. and 249 Japanese sailors died. The engagement was one of only two battleship-against-battleship surface battles in the entire Pacific campaign of World War II.
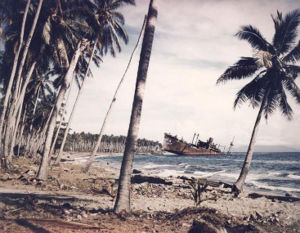
The four Japanese transports beached themselves at Tassafaronga on Guadalcanal by 04:00, November 15. The transports were attacked, beginning at 05:55 by U.S. aircraft from Henderson Field and elsewhere, and field artillery from U.S. ground forces on Guadalcanal. Later, U.S. destroyer Meade, approached and opened fire on the beached transports and surrounding area. These attacks set the transports afire and destroyed any equipment on them that the Japanese hadn't managed to quickly unload. Only 2,000-3,000 of the troops originally embarked actually made it to Guadalcanal and most of their ammunition and food supplies were lost. These troops and meager supplies weren't enough to have a significant effect on the Japanese defense of Guadalcanal.
Yamamoto's reaction to Kondo's failure to accomplish his mission of neutralizing Henderson Field and ensuring the safe landing of troops and supplies was milder than his earlier reaction to Abe's withdrawal, perhaps due to Imperial Navy culture and politics. Kondo, who also held the position of second in command of the Combined Fleet, was a member of the upper staff and battleship "clique" of the Imperial Navy while Abe was a career destroyer specialist. Admiral Kondo wasn't reprimanded or reassigned, but instead was left in command of one of the large ship fleets based at Truk.
Significance
The Naval Battle of Guadalcanal was the last major attempt by the Japanese to seize control of the seas around Guadalcanal or to retake the island. From then on, Japanese air and naval operations around Guadalcanal were defensive in nature, either to provide subsistence supplies to the Japanese forces on Guadalcanal, or beginning in January, 1943, attempts to evacuate and redeploy them elsewhere. In contrast, the U.S. Navy was thereafter able to resupply the U.S. forces at Guadalcanal at will, including the delivery of two fresh divisions by late December, 1942. The inability to neutralize Henderson Field doomed the Japanese effort to successfully combat the Allied conquest of Guadalcanal. The last resistance in the Battle of Guadalcanal ended on February 9, 1943 with the successful evacuation of the surviving Japanese troops on the island by the Japanese navy.
The securing of Guadalcanal and surrounding islands by Allied forces was the first step in their eventual conquest of the entire Solomon Islands chain and the isolation and neutralization of the major Japanese base at Rabaul, New Britain. Although the Allies and Japan engaged in several more intense and bloody naval battles during the Solomon Islands campaign, including some in which the Japanese emerged victorious, the Allied advance was never halted or even slowed to any appreciable extent. The capture of the Solomon Islands, along with New Guinea and New Britain, eventually led to the liberation of the Philippines in 1944 and early 1945, and then to invasion of Japan itself, at Okinawa and Iwo Jima, and the final defeat of Japan in August, 1945. Many historians believe the Battle of Guadalcanal to be just as key a turning point in the Pacific War as the Battle of Midway was six months earlier. In fact, the Japanese considered the Battle of Guadalcanal to be more significant than Midway. Historian Eric Hammel sums up the significance of the Naval Battle of Guadalcanal this way:
| On November 12, 1942, the (Japanese) Imperial Navy had the better ships and the better tactics. After November 15, 1942, its leaders lost heart and it lacked the strategic depth to face the burgeoning U.S. Navy and its vastly improving weapons and tactics. The Japanese never got better while, after November 1942, the U.S. Navy never stopped getting better. |
